
This post may contain affiliate links. Please read our disclosure policy.
If you’re looking for how to make orange juice at home (with or without a juicer), this homemade orange juice recipe is for you. I tested six different methods with a truly silly amount of oranges and photographed every step – so you can choose the option that matches the tools you already have and the kind of juice you like (extra pulpy or perfectly smooth).
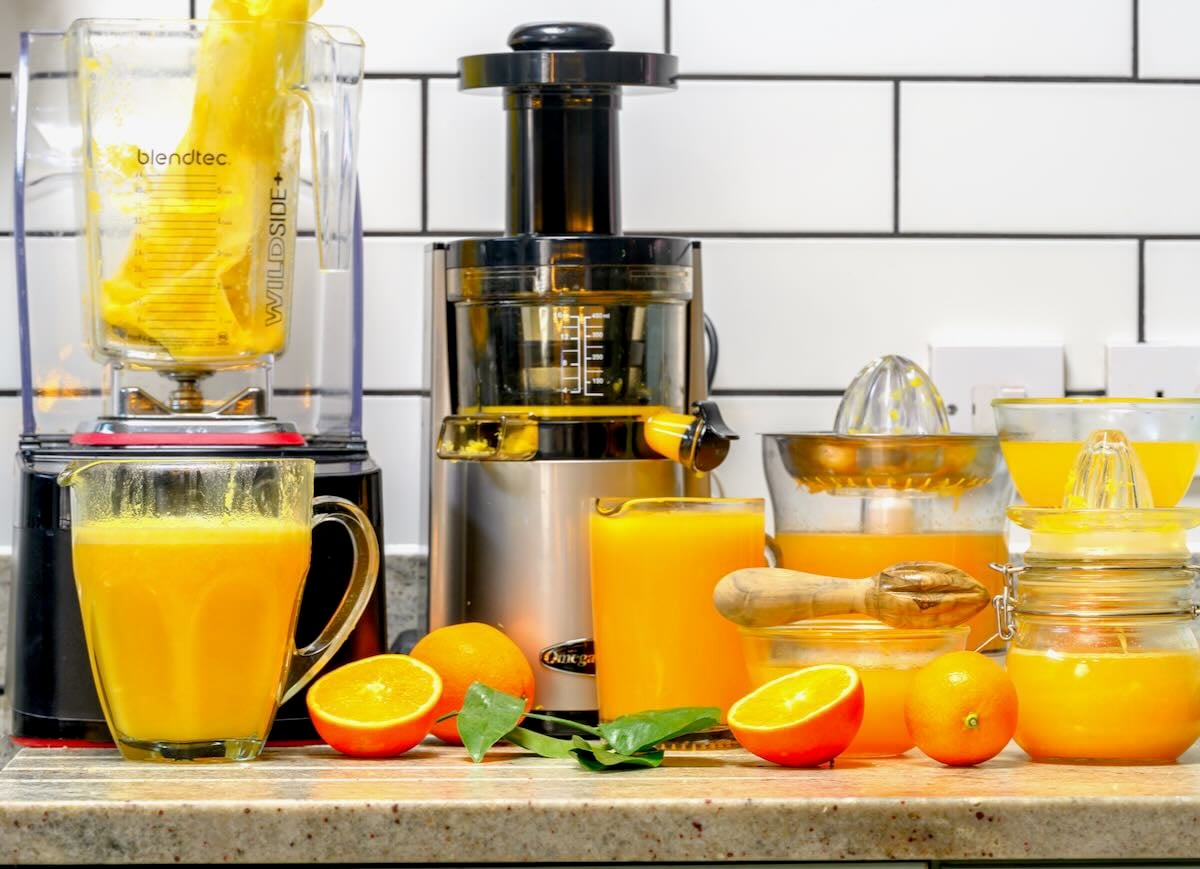
Here are the 6 ways you can make fresh-squeezed orange juice:
- Hand-squeezing: no tools, just a knife + your hands.
- Citrus reamer: simple, cheap, better extraction than hands.
- Manual citrus juicer: the classic press-and-twist style.
- Electric citrus juicer: fastest + best yield for most people.
- Blender + strain: more prep, great if you don’t have a juicer.
- Slow juicer or masticating juicer: excellent juice, more setup.
Below, you’ll also find my best tips for less pulp, less bitterness (hello, pith + seeds), how to choose the best oranges for juicing, how to store or freeze fresh OJ, and what to do with leftover pulp and peels.
If you’re on a fresh juice kick, you might also like my best juicing recipes, plus my grapefruit juice tutorial and apple juice guide.
Table of Contents
- What you’ll need
- Tools
- How to make orange juice (6 ways)
- Choosing the best method for your kitchen (2‑second answer)
- Top tips for better flavor + more juice
- Troubleshooting
- Serving ideas beyond a glass
- How to store orange juice
- What to do with leftover pulp and peels
- FAQs
- Related recipes
- Fresh Orange Juice (6 Methods: With or Without a Juicer) Recipe
What you’ll need
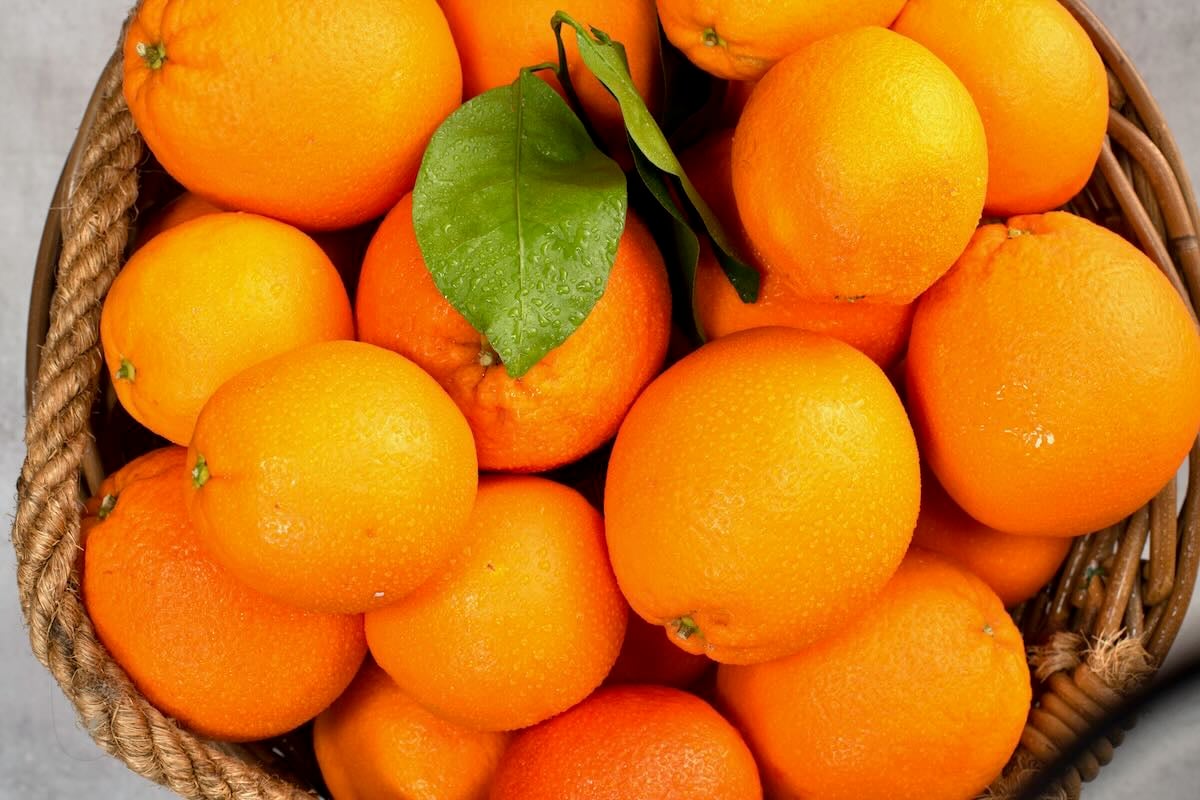
- Oranges (that’s it!). For the juiciest results, choose oranges that feel heavy for their size and have thinner skin (usually more juice, less dry pith).
- Cold water (optional – blender method only): add just enough to help everything blend smoothly.
Best oranges for juicing (quick guide):
- Valencia: classic “orange juice” flavor and usually very juicy.
- Navel: widely available and great for fresh juice.
- Cara Cara or blood oranges: gorgeous color (flavor varies).
- Mandarins, clementines, tangerines: sweeter, but you’ll likely need more fruit for the same amount of juice.
How many oranges do you need? (rough guide)
- It varies by size/variety, but 8 medium oranges typically yield about 2 cups (500 ml) of juice.
Tools
Pick what you have; you don’t need all of these!
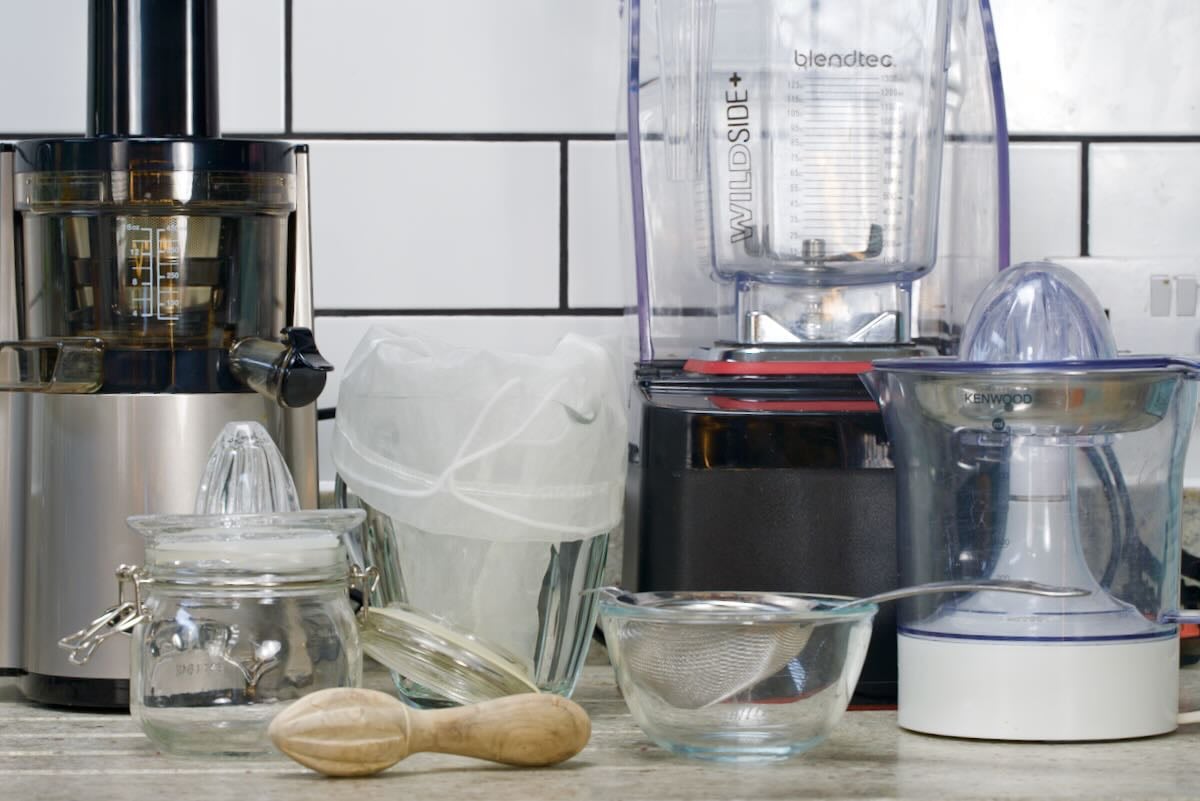
Essentials
- Knife + cutting board
- Bowl/jug (to catch the juice)
For smoother, low‑pulp juice (optional)
- Fine-mesh sieve OR nut milk bag
Choose ONE method tool
- Hands (hand-squeezing)
- Citrus reamer
- Manual citrus juicer (Kilner-style)
- Electric citrus juicer
- Blender
- Slow juicer / masticating juicer
How to make orange juice (6 ways)
Before you start (do this once)
- Wash and dry the oranges. Especially important since you’ll be handling the peel a lot.
- Roll each orange firmly on the countertop for 10–15 seconds to help loosen the juice inside.
- For easier juicing: use oranges at room temperature (cold fruit is harder to extract).
 1. Scrub
 2. Roll
Quick method picker (choose your vibe)
- No tools at all: Hand-squeezing.
- Cheap + compact tool: Citrus reamer.
- Tidy + classic setup: Manual juicer.
- Best for batches (fast + efficient): Electric juicer (my winner).
- No juicer, but want a bigger batch: Blender + strain.
- Already own one + like “cold press” style: Slow juicer.
Method 1: Hand‑squeezing (no juicer)
Tools: clean hands, knife, bowl/jug (optional: sieve)
- Cut the oranges in half.
- Hold one half over a bowl/jug and squeeze firmly, rotating as you go.
- Repeat with remaining oranges.
- For smoother juice, strain through a fine sieve to catch seeds + excess pulp.
Best for: “I only have oranges + a knife.”
Yield/effort: lowest yield, highest effort per cup (but works in a pinch).
Pulp level: high unless strained.
 1. Cut in half
 3.
3.  2. Squeeze
") 4. Sieve (optional)
4. Sieve (optional)Method 2: Citrus reamer (handheld “stick” juicer)
Tools: citrus reamer, knife, bowl/jug (optional: sieve)
- Cut oranges in half.
- Hold one half over a bowl.
- Press the reamer into the orange and twist firmly, working all the way around until the orange feels “spent.”
- Strain if you want less pulp.
Best for: inexpensive, compact tool; better leverage than hands.
Pulp level: medium-high unless strained.


Method 3: Manual citrus juicer (Kilner-style)
Tools: Manual citrus juicer with container, knife (optional: sieve)
- Cut oranges in half.
- Place one half on the juicer dome.
- Press and rotate to extract the juice.
- Pour and serve (strain only if you want it extra smooth).
Best for: tidy setup + easy pouring.
Pulp level: depends on the juicer holes (often medium).


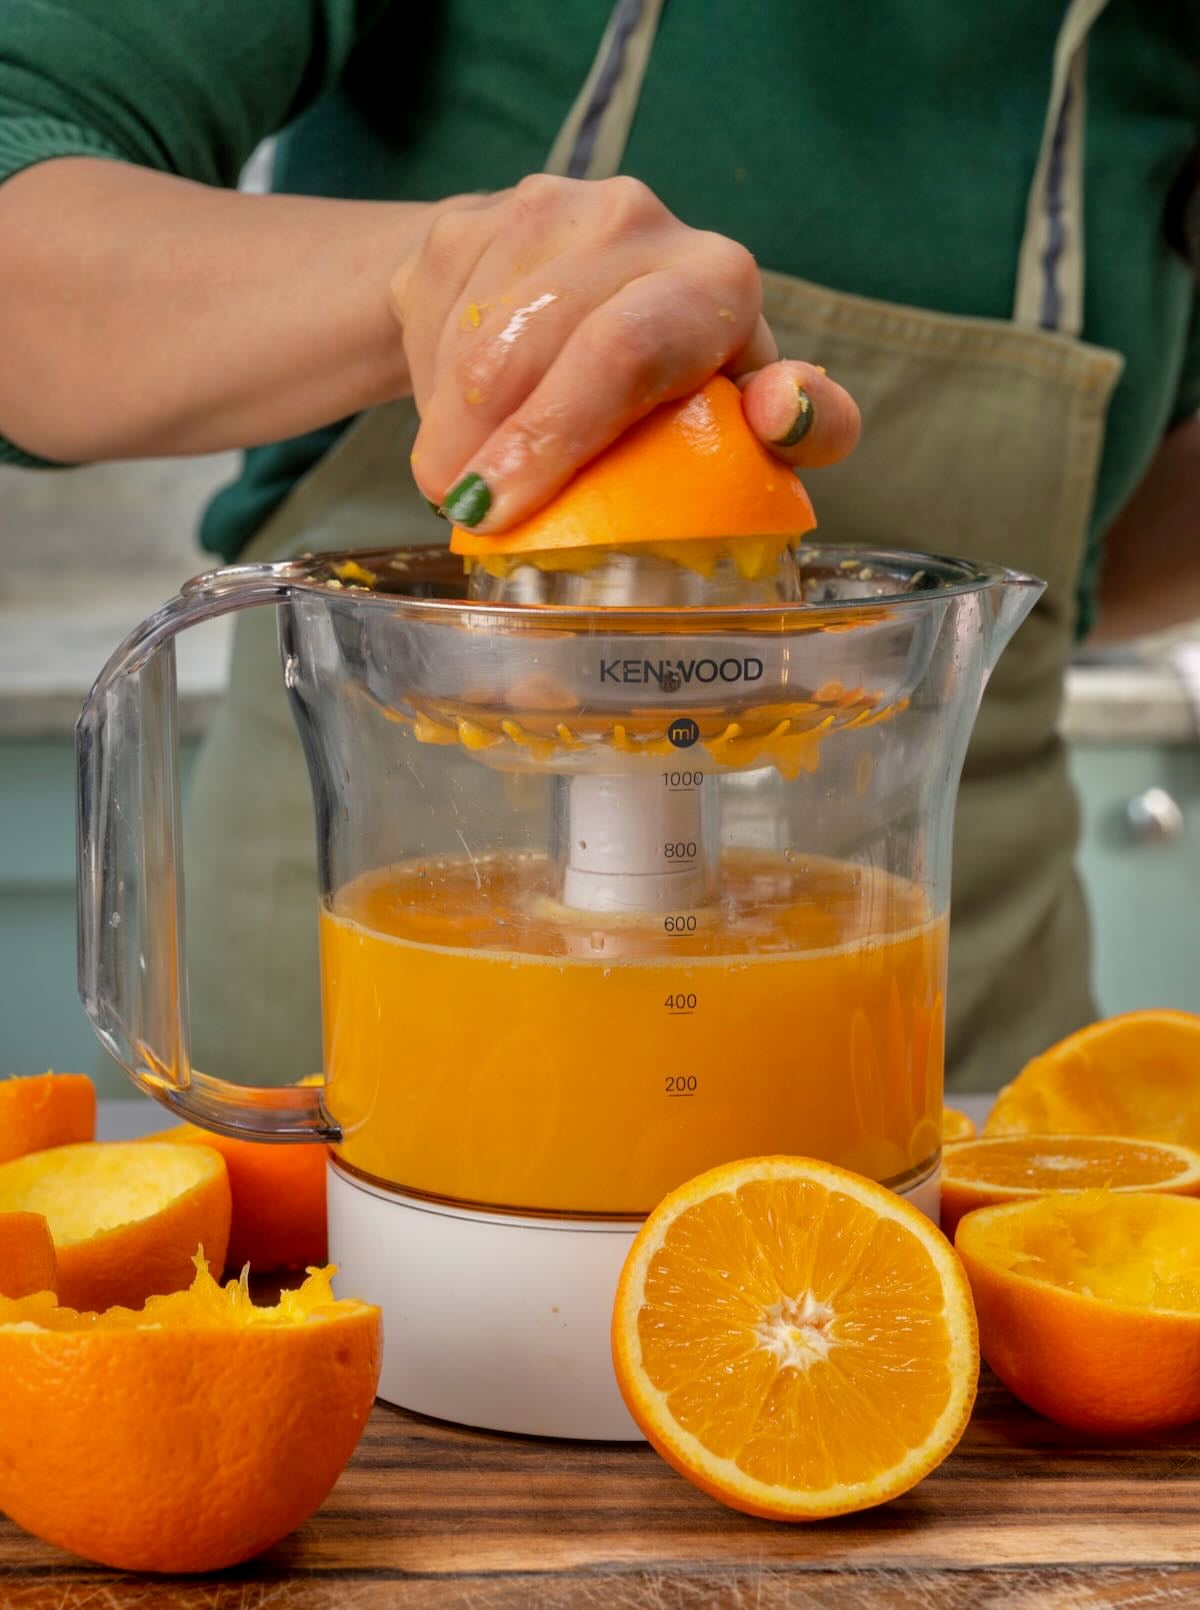
Method 4: Electric citrus juicer (fastest + most efficient in my testing)
Tools: electric citrus juicer
- Halve the oranges.
- Press a half onto the cone to activate the motor.
- Keep steady pressure while it reams, then repeat.
- Serve as-is, or strain if you want ultra-smooth juice.
Best for: speed + best yield when juicing a lot of oranges.
Pulp level: usually lower (varies by machine).
Method 5: Blender method (more prep)
Tools: blender, nut milk bag or fine sieve
- Peel the oranges completely.
- Break into segments and remove visible seeds.
- Add to blender with a small splash of cold water (start small; add more only if needed). I usually go with ½ cup of water per 4 oranges (use less if you want it more concentrated).
- Blend just until juicy and frothy.
- Strain through a nut milk bag (best) or fine sieve.
Best for: people without juicers who still want a bigger batch.
Pulp level: high unless strained.
Note: blended juice can look slightly lighter because it’s aerated (totally normal).
 1. Peel
 3. Blend
 5. Strain
 2. Remove seeds
 4.
4. 6.
6.Method 6: Slow juicer or masticating juicer
Tools: slow juicer
- Peel the oranges (remove excess white pith if you’re sensitive to bitterness).
- Segment and remove visible seeds.
- Feed segments into the slow juicer.
- Collect juice (and pulp separately, if your machine does).
Best for: slow-juicer people who like that style of juice.
Tradeoff: great results, but more peeling/prep than an electric citrus juicer.
 1.
1. 2.
2.Choosing the best method for your kitchen (2‑second answer)
- Occasional juice + zero equipment: hand-squeezing or citrus reamer.
- Most juice with the least hassle (especially batches): electric citrus juicer.
- No juicer at all, but want volume: blender + strain.
- Already own a slow juicer: use it; it’s great, just more prep for oranges.
Top tips for better flavor + more juice

- Pick heavier oranges: they usually have more juice and less dry pith.
- Use room‑temperature oranges: cold fruit is harder to extract.
- Roll before cutting: 10–15 seconds of rolling helps loosen juice inside.
- Cut to maximize extraction: slice oranges horizontally through the middle (widest part) so reamers/juicers grip better.
- Less bitterness: remove seeds (especially for blender/slow juicer). If blending, don’t over‑blend: short pulses help avoid crushing seeds.
- Pulp is optional: strain only if you want to. A quick strain through a sieve makes it smoother; a nut milk bag makes it extra smooth.
Troubleshooting
Most bitterness comes from:
– Seeds (especially if they get crushed in a blender)
– Lots of white pith/membrane (more noticeable in blender/slow juicer juice)
– Juice sitting too long before drinking
Fix: remove seeds, trim excess pith for blender/slow juicer methods, pulse briefly (don’t blend forever), and drink fresh.
You likely added too much water (or used ice). Use the smallest splash needed to get things moving.
Strain once through a fine sieve, or go extra smooth with a nut milk bag.
Try room-temp oranges + rolling first. If you make juice often, an electric citrus juicer is usually the easiest way to improve yield with less effort.
If your oranges taste flat or overly sharp, you can adjust with:
– a squeeze of lemon/lime (brightens) or ginger juice (for heat)
– a tiny bit of sweetener if oranges are unusually tart
– a pinch of salt to round sharpness
These are optional and totally depend on the fruit.
Serving ideas beyond a glass
Fresh orange juice is obviously great on its own (especially chilled), but it’s also an easy way to add sweetness + acidity to recipes.
Try it:
- Sparkling orange spritzer: orange juice + sparkling water + mint (or orange slices).
- Homemade popsicles: pour into molds (strain first for smoother pops).
- Smoothies: use as the liquid base (or use frozen juice cubes). I love adding it to this strawberry banana smoothie.
- Salad dressing: whisk with olive oil + a pinch of salt + mustard.
- Marinades/glazes: amazing in sticky sauces (think Chinese orange chicken).
- Party drinks: mix into easy fruit punch or mocktails.
- Baking: orange flavor really pops (like blood orange cake with pistachios).
How to store orange juice
Best fresh: Homemade orange juice tastes best right away. If it sits, it can separate (normal) and the flavor can dull.
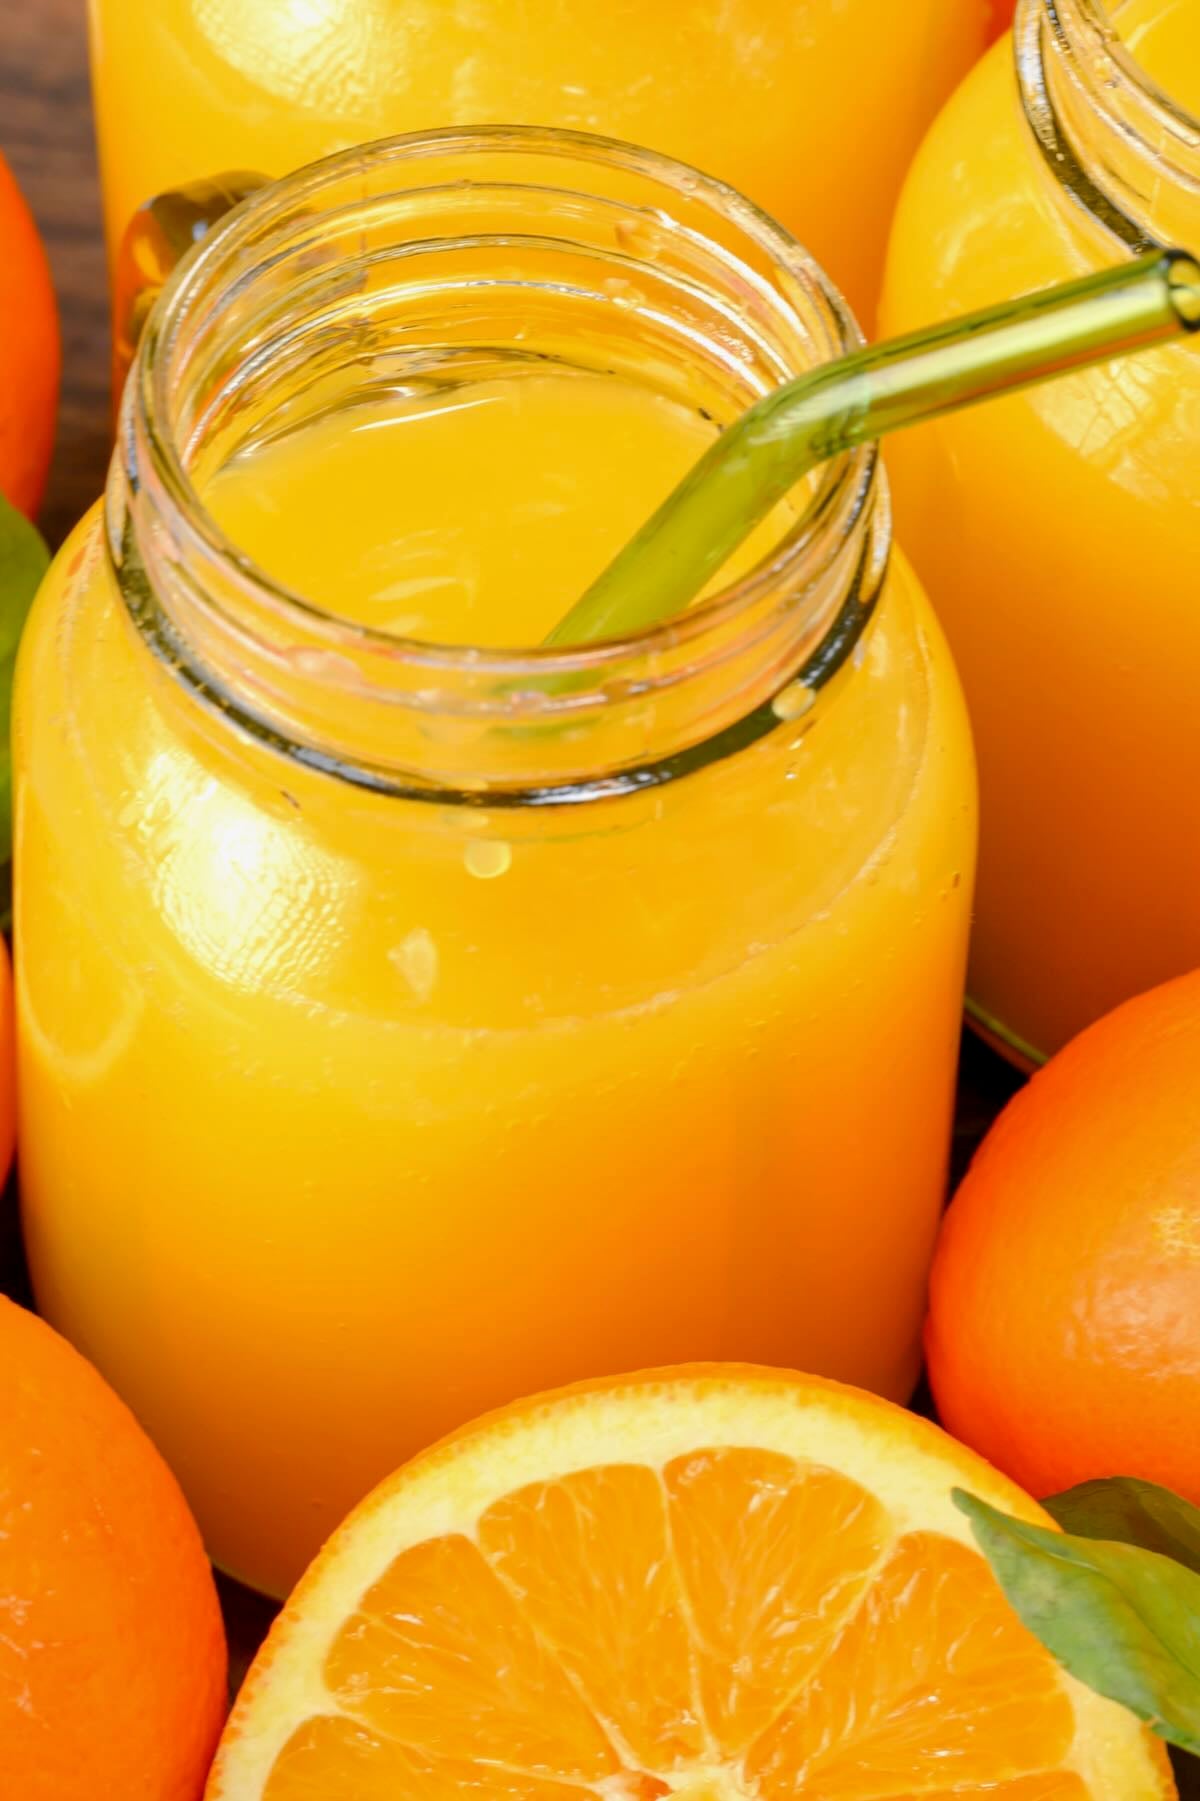
Fridge (short‑term): Store in a clean, airtight glass jar/bottle and drink within 24 hours for best flavor. It will usually keep well for 2–3 days in the fridge. If it separates, just shake or stir before serving.
- Tip: Fill the container as full as possible (less air = fresher taste longer).
Freezer (long‑term): The best method is to freeze orange juice in ice cube trays, then transfer cubes to a freezer bag/container. Thaw cubes in the fridge overnight, or drop cubes straight into smoothies. For best flavor, use within 2–3 months.
What to do with leftover pulp and peels
Leftover pulp: Don’t toss it – it’s basically citrus fiber.
Freeze in an ice cube tray, then:
- add a cube to smoothies
- stir into yogurt or oatmeal
- mix into muffin/cake batter for a subtle orange boost
Leftover peels: If you plan to use peels, wash and scrub the oranges well first.
Dry the peels (air-dry or low oven/dehydrator), then:
- blitz into orange peel powder
- steep strips in hot water for a simple citrus tea
Or use peels for:
- candied orange peel
- orange sugar (zest mixed into sugar)
- infused syrups
FAQs
Yes. Use the hand-squeezing method, a citrus reamer, or the blender + strain method.
For speed + easiest day-to-day batching, the electric citrus juicer wins. A slow juicer also works well, but it takes more prep (peeling/segmenting).
Most bitterness comes from seeds, lots of white pith/membrane, or juice sitting too long. Remove seeds, trim excess pith for blender/slow juicer methods, and drink it fresh.
For best flavor, drink it ASAP (ideally within 24 hours). Stored airtight, it’s typically good for 2–3 days. Shake/stir if it separates.
Yes! Freeze in ice cube trays for easy portions, then transfer cubes to a freezer bag/container.
It varies a lot by variety and freshness, but as a rough guide:
– 1 medium orange yields about ¼–⅓ cup (60–80 ml)
– 8 medium oranges yields roughly 2 cups / 500 ml


If you try any of these methods for juicing oranges, I would really appreciate a star rating and a short review below. It truly supports my work and helps others find the recipe.

Fresh Orange Juice (6 Methods: With or Without a Juicer)
Equipment
- Citrus reamer – OR –
- Manual citrus juicer – OR –
- Electric citrus juicer – OR –
- Blender/Food processor – OR –
- Fine mesh strainer optional, for low-pulp juice
- Nut milk bag optional, best for blender method
Ingredients
Base (All Methods)
- 2.5 pounds oranges 8 medium (common, navel, Valencia, tangerines, clementines, satsuma, blood orange, etc.)
Blender Method Only (Optional)
- 1 cup water as needed
Optional Add-Ins (Only If Needed)
- 1 Tablespoon lemon juice or lime juice, to taste
- 1-2 Tablespoons honey or maple, to taste
- 1/8 teaspoon salt to taste
Instructions
Prep
- Wash and dry the oranges.
- Roll each orange firmly on the countertop for 10–15 seconds to help loosen the juice.
- Cut the oranges horizontally through the middle (at the widest part).
Method 1: Hand-Squeezing (No Juicer)
- Hold an orange half over a bowl/jug and squeeze firmly, rotating as you go.
- Repeat with the remaining oranges.
- Optional: strain through a fine-mesh sieve for smoother, lower-pulp juice.
Method 2: Citrus Reamer
- Hold an orange half over a bowl.
- Press the reamer into the cut side and twist firmly until the orange feels “spent.”
- Optional: strain to reduce pulp.
Method 3: Manual Citrus Juicer
- Press an orange half onto the juicer dome.
- Press and rotate to extract the juice.
- Pour and serve. Optional: strain if needed.
Method 4: Electric Citrus Juicer
- Press an orange half onto the cone to activate the motor. Keep steady pressure while it reams.
- Repeat with the remaining oranges.
- Optional: strain for ultra-smooth juice.
Method 5: Blender + Strain
- Peel the oranges completely.
- Separate into segments and remove visible seeds (important for avoiding bitterness).
- Add oranges to a blender with cold water as needed. Start with 1/2 cup; use up to ~1 cup for 8 oranges if needed to get things moving.
- Blend just until juicy and frothy (don’t over-blend).
- Strain through a nut milk bag (best) or fine-mesh sieve.
Method 6: Slow Juicer / Masticating Juicer
- Peel oranges (remove excess white pith if you’re sensitive to bitterness).
- Segment and remove visible seeds.
- Feed segments into the slow juicer.
- Collect juice (and pulp separately, if your machine does).
Serve + Store
- Taste the juice. If needed, adjust with lemon/lime, a touch of sweetener, or a tiny pinch of salt.
- Serve immediately, or chill. If it separates, shake/stir before serving.
Video
Notes
Nutrition
Nutrition information is automatically calculated, so should only be used as an approximation.


I liked your articles very much. I learned a lot from here.
Thanks.
love this new article on oranges.
Thank you 🙂
Apt explanations, and easy to follow steps. Thank you. I’ll definitely be trying this today.